M365 Development · SharePoint

Easily edit PnP Modern Search web parts properties

The PnP Modern Search solution contains multiple SharePoint Online modern web parts. Each of these web part is highly flexible and customizable. It means that each web part and more specifically the Search Results web part has many properties that you can set.

If you want to use PnP Modern Search web parts on many pages, it can be time consuming to set every time the same properties.

This blog post introduces two methods that will help you speed up PnP Modern Search web part configurations.

Content

  1. Using the property pane
  2. Using PowerShell
    1. Prerequisites
    2. Get current properties
    3. Edit properties
    4. Update web part
  3. Conclusion
  4. References

Using the property pane

The first option that you have to quickly edit properties of a PnP Modern Search web part can be found directly on the web part’s property pane (page 4).

Clicking on the Edit properties button will open up a new pane with raw web part properties in edit mode.

There you can directly edit properties from the embedded code editor. You can also Export properties (as a JSON file), edit it in your favorite code editor and finally Import the JSON file with updated properties.

As an example, let’s try to hide the results count of the Search Results web part:

By default, the the PnP – Search Results web part displays results count => showResultsCount property is set to true.

Now if you change the showResultsCount to false, the results count will be hidden:

Using PowerShell

Now if you have to edit a lot of pages you can automate things using PowerShell and more specifically the PnP PowerShell module.

Prerequisites

In this section we are going to use the PnP PowerShell module. If you haven’t already used it, please follow instructions there: Installing PnP PowerShell.

Get current properties

First, you need current web part properties. Let’s use the Get-PnPPageComponent cmdlet to retrieve current web part properties as an object:

$pageName = "Search"
$wpInstanceId = "4f78965f-3c5f-485f-9099-e0c98f1c6edd"
$currentSearchProperties = (Get-PnPPageComponent -Page $pageName -InstanceId $wpInstanceId).PropertiesJson | ConvertFrom-Json

You can easily find the instance Id of a PnP Modern Search web part using its property pane:

Edit properties

Now you can edit web part properties.

As an example let’s edit the query template property in order to get only News posts in the Site Pages library:

$currentSearchProperties.dataSourceProperties.queryTemplate = 'Path:"https://{tenant}.sharepoint.com/sites/organization-portal/SitePages" AND ContentType:"Site Page" AND PromotedState:2'

Update web part

Once you have edited the properties, you can update the web part using the Set-PnPPageWebPart cmdlet:

$pageName = "Search"
$wpInstanceId = "4f78965f-3c5f-485f-9099-e0c98f1c6edd"
Set-PnPPageWebPart -Page $pageName -Identity $wpInstanceId -PropertiesJson ($currentSearchProperties|ConvertTo-Json -Depth 3)

What is important here is to convert the $currentSearchProperties to JSON so it can be accepted by the cmdlet.

Conclusion

In this blog post we covered how to quickly edit PnP Modern Search web parts properties using either the web part property pane or the PnP PowerShell module.

References

M365 Development · SharePoint · Viva Connections

How to use text input in Adaptive Card Extensions’ card views

To use an input field on an Adaptive Card Extension (ACE), you could only do it on a quick view of the card. Since SPFx v1.18, it is possible to use a text input component directly on an Adaptive Card Extension’s card views.

For instance, if your adaptive card main purpose is to get a simple input from users, you could really benefit from this new feature.

This blog post demonstrates how to implement this feature.

Content

  1. Requirements
    1. New adaptive card
    2. Existing adaptive card
  2. Use the new default class for card views
  3. From the card footer
  4. From the card body
  5. References

Requirements

New adaptive card

If you want to implement the feature on a new adaptive card extension, perform the following steps:

  1. Make sur you have the latest version of the SharePoint Framework installed : npm install @microsoft/generator-sharepoint@latest --global
  2. Run yo @microsoft/sharepoint
  3. Select Generic Card Template in the generator

Existing adaptive card

You can also implement this feature on an already existing ACE created with an on older SPFx version. To do so, you need to migrate your Adaptive Card Extension to SharePoint Framework v1.18.

Since SPFx v1.18 new classes and other architectural changes, migration to this version requires additional steps. You can find more details here: Migrate Adaptive Card Extensions to SharePoint Framework v1.18

Use the new default class for card views

SPFx v1.18 introduce BaseComponentsCardView as the new default class for Adaptive Card Extensions card views. You can use this new class to specify components that you want to display in a card view:

The first option that you have, is to use a text input component in the footer of your card view.

In the BaseComponentsCardView class, define the BasicCardView as follows:

As you can see, the componentName property of the footer is defined as textInput. You also have the following properties:

PropertyDescription
idId of the component
placeholderPlaceholder of the text input component
button/iconDefine the icon of the button
button/actionAction to perform when the button is clicked

From the card body

The second option is to use an text input component in the body of your card view.

In the BaseComponentsCardView class, define the TextInputCardView as follows:

Here the textInput component is defined in the body. You can set the following properties:

PropertyDescription
idId of the component
placeholderPlaceholder of the text input component
iconBeforeDefine the icon on the left-hand side of the input component.

Note that in this case the button is still defined on the footer part of the Adaptive Card Extension.

References

M365 Development

Mock responses with the Microsoft Graph Developer Proxy

The Microsoft Graph Developer Proxy is a tool that can help you test applications which use Microsoft Graph and other APIs. You can use this tool to perform the following tests:

  • Mocking responses
  • Simulating errors
  • Simulating throttling

In this blog post, we are going to see an example on how to use the Microsoft Graph Developer Proxy to mock API call responses without any code modification.

If you want more details about the Microsoft Graph Developer Proxy, you can go here: msgraph-developer-proxy.

Content

  1. Getting started
  2. Why mocking responses ?
  3. Responses configuration
  4. Start the proxy and test the application
  5. Summary
  6. References

Getting started

For this example, we will use:

  • A Microsoft 365 demo tenant – you can get one by signing up to the Microsoft 365 Developer Program
  • The Microsoft Graph Developer Proxy (obviously ;)) – you can install it by following the steps described here: Get started
  • An application using the Microsoft Graph API – in this example, we will use a Viva Connection Adaptive Card Extension that you can find here: ImageCard-MostLikedPages

Why mocking responses ?

In our case, the application displays most liked pages out of a list of selected SharePoint sites using the Microsoft Graph API.

To test this adaptive card extension, as a developer, you need to create multiple pages across different sites and to log on as different users to like those pages. This can take a lot of time, especially if you want to test different scenarios (e.g.: hundred of pages with multiple likes each).

Of course you could create your own file containing sample data instead of your real API call response. But then you would have to make some changes in your code, so this is not an ideal solution.

The great benefit of using the Microsoft Graph Developer Proxy is that you can mock responses without making any changes to your code !

Responses configuration

To configure the responses to mock, we need to create a responses.json. The great thing with the Microsoft Graph Developer Proxy is that each application can have its own responses.json file.

In our example, let’s create this file at the root of our ACE solution:

{
  "responses": [
    {
      "url": "", // URL of our API endpoint
      "method": "", // Method of our API call
      "responseBody": {}, // Body to send as the response to the request
      "responseHeaders": {} // Headers to include in the response
    }
  ]
}

We now want to mock a response to the following API call: https://graph.microsoft.com/beta/sites/{site-id}/pages?$select=reactions,title,webUrl,thumbnailWebUrl to get all pages of a specific site, along with their respective numbers of likes.

Our file will look like this:

{
  "responses": [
    {
      "url": "https://graph.microsoft.com/beta/sites/{site-id}/pages*",
      "method":  "GET",
      "responseBody": {
        "@odata.context": "https://graph.microsoft.com/beta/$metadata#sites('{site-id}')/pages(reactions,title,webUrl,thumbnailWebUrl)",
        "value": [{
        "webUrl": "SitePages/Page-1.aspx",
        "title": "Microsoft Graph Developer Proxy",
        "thumbnailWebUrl": "",
        "reactions": {
            "likeCount": 42
        }
    },
    {
        "webUrl": "SitePages/Page-2.aspx",
        "title": "About blueberries",
        "thumbnailWebUrl": "",
        "reactions": {
            "likeCount": 33
        }
    },
    {
        "webUrl": "SitePages/Home.aspx",
        "title": "Home",
        "thumbnailWebUrl": "",
        "reactions": {}
    },
    {
        "webUrl": "SitePages/Page-3.aspx",
        "title": "Work from home",
        "thumbnailWebUrl": "",
        "reactions": {
            "likeCount": 12
        }
    }]
      },
      "responseHeaders": {
        "content-type": "application/json; odata.metadata=minimal"
      }
    }
  ]
}

It is important to define the absolute URL of the API endpoint. For example, here we define pages to return for a specific site ({site-id}).

Start the proxy and test the application

When you start the proxy, you define its settings depending on what you want to test.

In our case, we want to test successful API calls with mock responses. In a PowerShell console, we enter the following line:

m365proxy --mocks-file {root-folder-path}\ImageCard-MostLikedPages\responses.json --failure-rate 0

Now let’s load our application returning the SharePoint pages with their number of likes defined in the responses.json file.

We can also see on the PowerShell console that the request was successfully interpreted by the proxy.

Summary

In this blog post, we performed the necessary steps to use the Microsoft Graph Developer Proxy to mock API call responses. This feature can be used in multiple scenarios, for example to easily test specific responses or to test how an application handles a large amount of data. It is also possible to define unsuccessful responses with a specific error code to test how the application handles it.

References

Introducing the Microsoft Graph Developer Proxy community preview

Microsoft Graph Developer Proxy

Mock responses

M365 Development · SharePoint

Use Top Actions with SPFx 1.17.1

Content

What are Top Actions ?

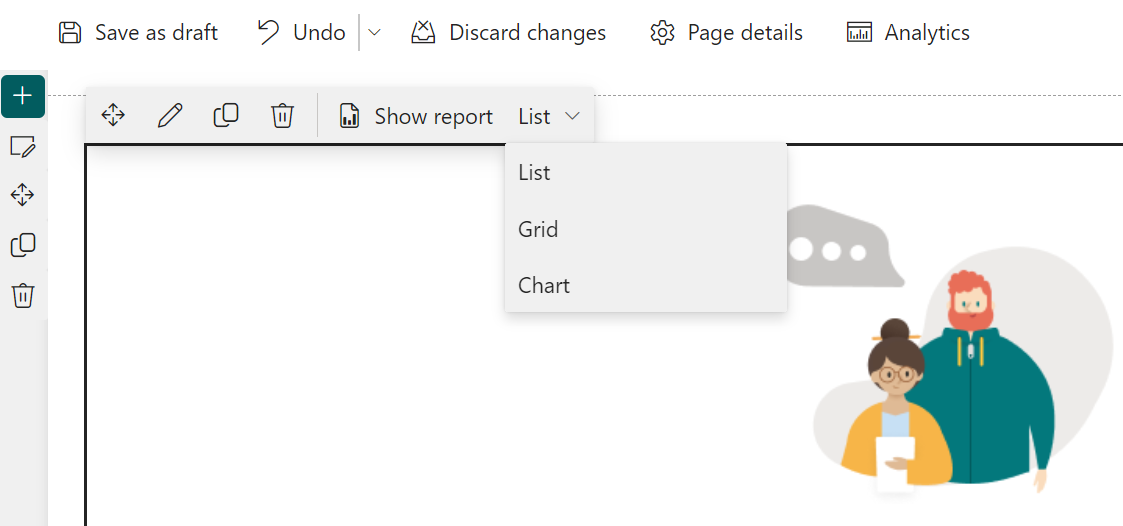
Top Actions allow you to add settings to your SharePoint Framework (SPFx) web part just like you would do on the property pane but directly on the web part’s command bar.

Top Actions were introduced in the SPFx v1.16 release (preview). In this blog post we will talk about how to use this feature with the SPFx v1.17.1 release (there are a few differences).

You can choose from two different user interfaces for your top action:

  • Button
  • Dropdown list

How to use it ?

Add Top Action to your web part

To add top actions to your web part, you must implement the getTopActionsConfiguration() method which return ITopAction object:

import { ITopActions } from '@microsoft/sp-top-actions';

export default class HelloWorldWebPart extends BaseClientSideWebPart<IHelloWorldWebPartProps> {

  public getTopActionsConfiguration(): ITopActions | undefined {
    return {
      topActions: [], //List of top action controls you want to add to your web part
      onExecute: (actionName: string, newValue: any) => {} // Method triggered when you select one of the top action
    };
  }

Use button control

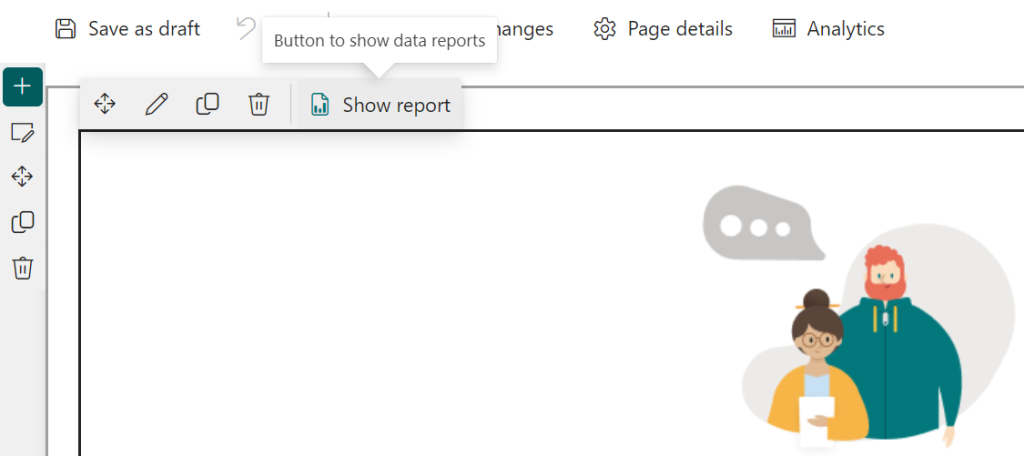
To define a button control (TopActionsFieldType.Button) define the following properties in topActions:

import { ITopActions, TopActionsFieldType } from '@microsoft/sp-top-actions';

export default class HelloWorldWebPart extends BaseClientSideWebPart<IHelloWorldWebPartProps> {

  public getTopActionsConfiguration(): ITopActions | undefined {
    return {
      topActions: [
        {
          targetProperty: 'button', // Target property from the web part’s property bag
          type: TopActionsFieldType.Button,
          title: 'Button to show data reports', // Display name of the action (can be used in a tooltip or aria-label)
          properties: {
            text: 'Show report',
            icon: 'ReportDocument'
          }
        }
      ],
      onExecute: (actionName: string, newValue: any) => { 
        console.log(actionName); // value of the targetProperty ('button' in this example)
        console.log(newValue); // true (always the same value for button controls)
      }
    };
  }

Use dropdown list control

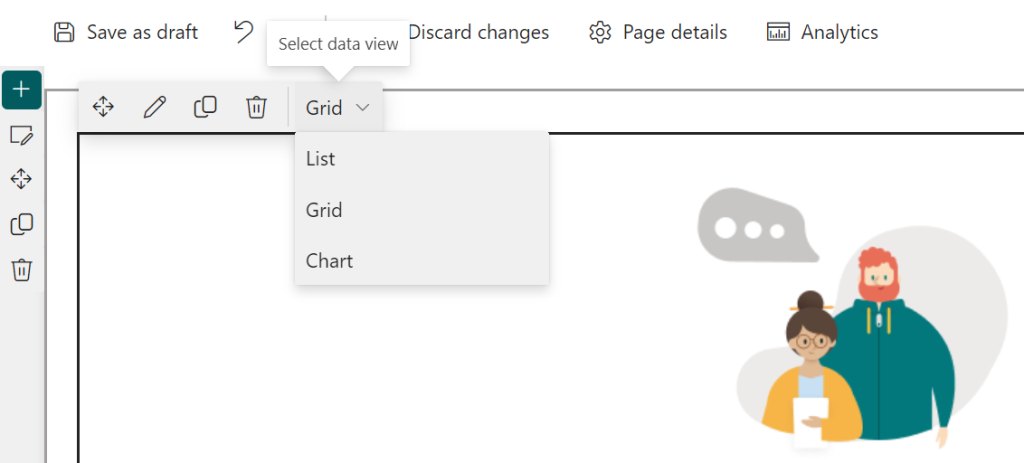
To define a button control (TopActionsFieldType.Dropdown) define the following properties in topActions:

import { ITopActions, TopActionsFieldType } from '@microsoft/sp-top-actions';

export default class HelloWorldWebPart extends BaseClientSideWebPart<IHelloWorldWebPartProps> {

  public getTopActionsConfiguration(): ITopActions | undefined {
    return {
      topActions: [
        {
          type: TopActionsFieldType.Dropdown,
          title: 'Select data view', // Display name of the action (can be used in a tooltip or aria-label)
          targetProperty: 'displayMode', // Target property from the web part’s property bag
          properties: {
            options: [{
              key: 'list',
              text: 'List',
              checked: this.properties.displayMode === "list"
            }, {
              key: 'grid',
              text: 'Grid',
              checked: this.properties.displayMode === "grid"
            },
            {
              key: 'chart',
              text: 'Chart',
              checked: this.properties.displayMode === "chart"
            }]
          }
        }
      ],
      onExecute: (actionName: string, newValue: any) => {
        console.log(actionName); // value of the targetProperty ('displayMode' in this example)
        console.log(newValue); // value of the key of the selected option (e.g. : '2' if Grid is selected)
        this.properties.displayMode = newValue;
      }
    };
  }

What about icons for dropdown options ?

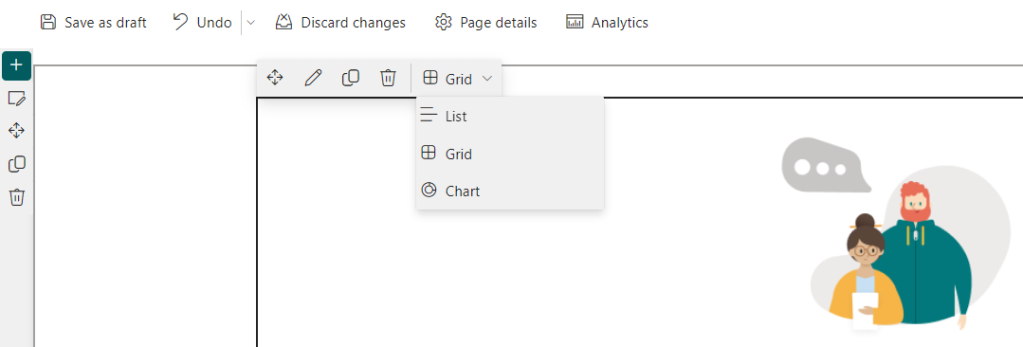
You can also add an icon for each option available in the dropdown control using iconProps:

properties: {
            options: [{
              key: 'list',
              text: 'List',
              checked: this.properties.displayMode === "list",
              iconProps: {
                officeFabricIconFontName: "List"
              }
            }, {
              key: 'grid',
              text: 'Grid',
              checked: this.properties.displayMode === "grid",
              iconProps: {
                officeFabricIconFontName: "GridViewMedium"
              }
            },
            {
              key: 'chart',
              text: 'Chart',
              checked: this.properties.displayMode === "chart",
              iconProps: {
                officeFabricIconFontName: "DonutChart"
              }
            }]
          }
Dropdown options with icons

Working sample of code

If you want to try out Top Actions by yourself you can find a small web part sample that I built here: react-graph-webpart-report

References